
It's been nearly a year to the day that the Nikon D3 and D300 were shipped and Nikon are now adding to their full frame range with the Nikon D3x making them the first company with an entire compliment of full frame DSLRs.
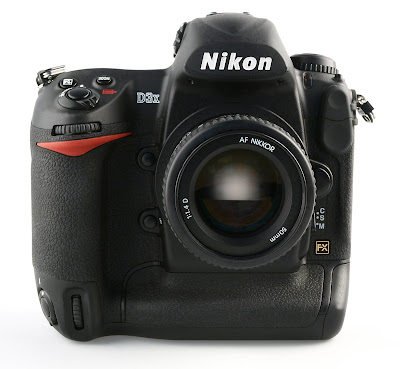
Nikon D3x: Specification
- Resolution: 24.5Mp
- Sensor size: 35.9x24.0mm
- Sensor type: CMOS FX type
- Image size: 6048x4032
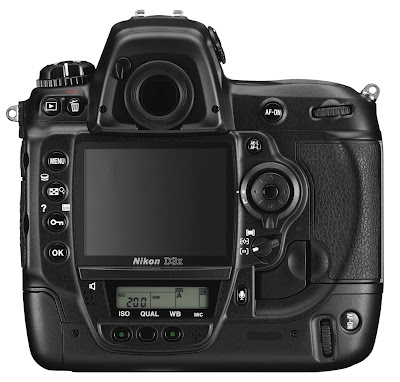
- Focus system: Multi-CAM 3500FX
- Focus points: 51 (inc. 15 cross type sensors)
- Lens mount: Nikkor type G or D
- File type: JPEG, RAW (NEF), TIFF (RGB)
- Sensitivity: ISO100-1600 (ISO50-6400 equivalent)
- Storage: Dual slot UDMA enabled Compactflash
- Focus types: Single point AF, Continuous AF, Focus tracking, Manual with electronic rangefinder
- Metering system: TTL full aperture metering using 1,005px RGB sensor
- Metering types: 3D colour matrix, centre-weighted, spot
- Exposure compensation: /-5EV in 1/2, 1/3 or 1 step increments
- Shutter speed: 30sec-1/8000sec, bulb
- Frames per second: 5fps FX, 7fps DX
- Flash: External only
- Flash metering: TTL flash control
- Flash sync speed: 1/250sec
- Image stabilisation: Lens based
- Integrated cleaning: Image Dust Off reference data
- Live view: Handheld, tripod mode
- Viewfinder: Optical, 100% field of view in FX mode, 97% in DX mode
- Monitor: 3in TFT LCD polysilicon monitor, 920,000dot with brightness adjustment
- Interface: USB2.0
- Power: Li-Ion battery
- Size: 159.5mmx157mmx87.5mm
- Weight: 1220g body only
Posted on 13.45
Label:
Tips
Blurring the background & foreground of your pictures will cause your subject to visually Pop! These steps will teach you this technique (BOKEH)

Step1> Choose the right camera. If possible, try to get your hands on a dSLR rather than a point and shoot camera. A dSLR has much more control over the settings and the blurred effect, a.k.a
BOKEH. The challenge with a point and shoot camera is that it is deigned to capture the entire picture in focus.
Step2> There are two settings that will allow you to apply the BOKEH effect: 1. Use the AV setting and 2. Use the portrait setting.
Step3> Using the AV setting is the preferred approach and will give you more control over the depth of field. Think of the AV setting as controlling the size of the depth-of-field front to back. The larger the AV setting, the more in front and in back of the subject will be in focus. An AV setting of 1.8 (f/stop) will have a very small depth-of-field (little in focus), while an AV setting of 22 will have a very large depth-of-field (everything in focus). For portraits, I typically use an AV setting of 4.0 - 5.6. ***WARNING - DO NOT USE A FLASH. A flash can kill the effect.
Step4> Using the portrait setting (looks like a head) may produce a similar effect, but usually there's no control over the depth-of-field. In my experience, I haven't had any success getting a good BOKEH effect from a point and shoot camera. The best chance you have is to use the portrait setting outside, in a lot of light/without a flash, and position your subject so that the background is very FAR AWAY. This might produce a blurred background and a sharp subject.
Posted on 09.00
Label:
Tips
By: Andi Sucirta
Based on my experience, photography is not only about gears. Photography is closely related to how you wisely and correctly use your gears, resulting in good photographs. The secret does not lie behind the technology utilized. Technology changes, but good photography is eternal.
On my journey in photography, I always hold one value dearly: shoot it right from the start. This is true since the analog era to the digital era, in which we are presently in.
Digital photography does not magically transform a bad picture into a good photograph. Digital photography is used to get the best out of an already good photograph. If we are able to do just that, we already have all the correct basis. Whether the picture will be further post processed digitally is a different story altogether.
Easy & Simple
Photography as a hobby, certainly not my main job, forces me to invent strategies in order to pursue photography further. One such strategy is to make this hobby easy and simple.
Currently I have one camera and one lens. The reason is very simple: I can only afford to buy one camera and one lens. This condition has its own benefits: I can simply concentrate more on the subject at hand than on my gears, and obviously the weight of my gears is substantially less than the others’. Other accessories include a tripod, a hot-shoe flash, memory cards, spare batteries, and a few filters.
Before taking a photo, I always make sure that the batteries, including the spares, are charged and full, the memory cards are empty or already transferred onto the computer, and always carry spare memory cards.
Developing Ideas
I always try to gather as much information as possible about a photo object. The goal is to get answers for: who, what, where, when, why and how. I imagine all angles, compositions, shutter speeds and others. It does not matter whether the imagination will apply in the field. It is the preparation and the planning that is important. In the field I just improvise depending on the condition.
I also try to think about concepts and creative ideas, by learning what others have done, and probably have not done. I say “probably” because I have no ability of knowing whether an idea has been implemented into a photograph or not. Almost all ideas and techniques has been applied onto photographs. What is possible now is to develop those same ideas creatively. Digital photography enables people to learn photography in easier manner. Only creative process now distinguish one photographer from another. On this, do not confuse creativity and digital postprocessing.
About the writer
Andi Sucirta (www.andisucirta.com)
A photography lover, he is also a medical doctor serving remote island in Nusa Tenggara Timur a few years back. Armed with an analog Nikon F100, he captured the natural beauty and the activity on the island. The slide film used were sent from Bali and then sent back to Bali for processing and printing. With the income he had at that time, he confesed, he almost went bankrupt because of this hobby of his.
This article was taken from www.exposure-magz.com, and you can download the magz for free!
By Cipto Aji Gunawan
It all first began with diving sport, which eventually becomes boring. It was no longer enough for me to just dive, come back on land safely, and tell the story of a beautiful undersea world.
There had to be a “souvenir” of some sort to share with others. One such souvenir would be a photograph. There started the beginning of my underwater photography activity. Photo is the media to introduce the submarine world.
In 1995 I started to pursue underwater photography. I used film camera, back then. My job as a diving instructor had given me opportunity to develop skills in my new found hobby. The advent of digital cameras accelerate every aspect of underwater photography. With equipment price getting lower by the day, more and more people embrace the field of underwater photography.
Even then, not everyone can take picture underwater. You have to be a certified driver first. You have to master the safety rules of diving as well as diving techniques. Only after you have mastered diving, you can start with studying underwater photography.
Less Appreciated
I have done quite a lot of underwater photography. The resulting photos are excellent. I always try to show them to people. But what do the say?
I always felt that appreciation to underwater photos are very nominal. This fact saddened me, but I understand the reason behind it. Many people still did not know the real value of underwater photography.
As a diver, I had to be involved in underwater conservation. If still many people were not interested in underwater photograph I made, conservation would be a hard topic to address to these people. Indonesia has a whealth of undersea beauties hidden beneath the vast sea. I believed that without my conservation effort the seas would just become a vast trash can.
Without Diving Equipment
Around three years ago I read a book published abroad about underwater modelling. This fresh idea appealed to me.
I have done a lot of photographing people underwater with scuba gears, easily and without problems. Except that in that underwater modelling book, the model was underwater without any gears whatsoever. The model wore wardrobe as if she was on land, eyes opened, even smiled. This was so incredible. I was very inspired by the book. After figuring out the methods, I started looking for a model for a photo session. I found a few models, which I, then trained. Sadly, they all failed to become underwater model. It wasn’t easy afterall.
Beginning of 2007 I found a suitable model. She couldn’t swim, but her body was fit for a diver. She was slim, large boned, and with little body fat. I was cocerned more on her will and mental strength, instead of her swimming ability.
I started to train her in a swimming pool. Shallow pool at first, then gradually I moved her to deeper pool. Besides diving, I also taught her how to regulate her breathing and trained her to pose for an underwater photo session. The results were nothing short of incredible.
Growing Interest
I decided to publish a few photos to websites. I also wrote small article as an introduction to underwater photography. I personally believe that people’s interest in underwater photography started to grow. And it all started with this model without any diving equipment. Imagine that, for 10 years in underwater photography, I felt that it had been very hard to get people’s attentions. The same could not be said for the past few months. I started to feel the results.
A few pictures on this magazine has since become topics of discussion. A TV station, and another magazine also express the interest to publish the behind-the-scene story.
Not only models are discussed, undersea objects around the model also sparked interests, ranging from fish to coral, and others. This is the time for me to talk about conservation.
About the writer:
Cipto Aji Gunawan (ciptoag@gmail.com)
Starting underwater photography and videography since 1995, and now he is a consultant and course director of PADI (Professional Association of Diving Instructors) based in Bali, Indonesia.
This article was taken from www.exposure-magz.com, and you can download the magz for free!

Carlsberg, has launched a web tv channel about Football. From
Carlsberg web-tv Part of the Game, you can see various moments in football. Not only incredible goals or great matches, here you’ll take unforgettable videos about fans emotion on football matches.
The site,
Partofthegame.tv will have 5 channels showing all aspects about football from the classic football matches to life as a fan. As similar to YouTube, users can upload their videos to this site as well.
This full flash web will help you keep up with everything going on in Football field. So check out this awesome site by Carlsberg at
Partofthegame.tv.
www.partofthegame.tv


